
All small brands and individual makers can have a high-end finish without a studio. A seamless photo background change boosts product images, gets packaging looking high-end, and fuels a consistent brand narrative. Pippit’s Image Studio makes it easy: remove a cluttered background, add a styled setup, and tweak light and color, so the picture looks like a pro shoot. With a few household tricks and smart editing, your next product drop can look editorial even if it was shot on a kitchen table.
Stage design on a budget: thinking like a set stylist
Begin with a neutral surface that looks good with your product; craft paper, marble print paper, or sanded wood are all good bets. For light, a large diffused source such as a window or a white sheet over a lamp. Don’t hold negative space planned so the eye can have a place to rest. Those small set decisions make background subtractor neater and substitutions more authentic.
How to take pictures that will accept swaps
If you can plan on changing backgrounds later, photograph in front of a plain, evenly lit background to allow the removal tool to easily separate edges. Position the subject a few feet from the background to make natural separation and soft shadow, which will help to anchor it in the new environment. Use a tripod or other stable base for consistent framing between shots so that you can batch edit.
Three affordable props that raise perceived value
Texture boards, a single prop, and a reflect card are your friends. Texture boards mimic more expensive surfaces, a judiciously selected prop speaks volumes, and white cards reflect light into shadows, so your product appears sharp. Use props strategically; the idea is to suggest lifestyle without stealing the show.
Upgraded quick retouch moves that feel high-end
Blast away dust, gently move around highlights to prevent blowout, and edge-sharpen selectively. Use a gentle color grade over subject and background so that both have the same mood. A subtle vignette can lead the eye without hogging the attention. Edited stills create great short clips. Insert a parallax, slow zoom, or fast reveal to grab attention. Trim these clips to platform lengths to keep momentum tight. Pippit’s online video trimmer assists you in cutting sequences to the precise durations where engagement is highest.
The lighting checklist that saves edits
Accomplish a distinct highlight and gentle fill, so your product shoots with convincing depth. If you’re using directional light, maintain its brightest side uniform throughout exposure. When you change backgrounds in Pippit, align highlight direction, so reflections and shadow fall appear realistic.
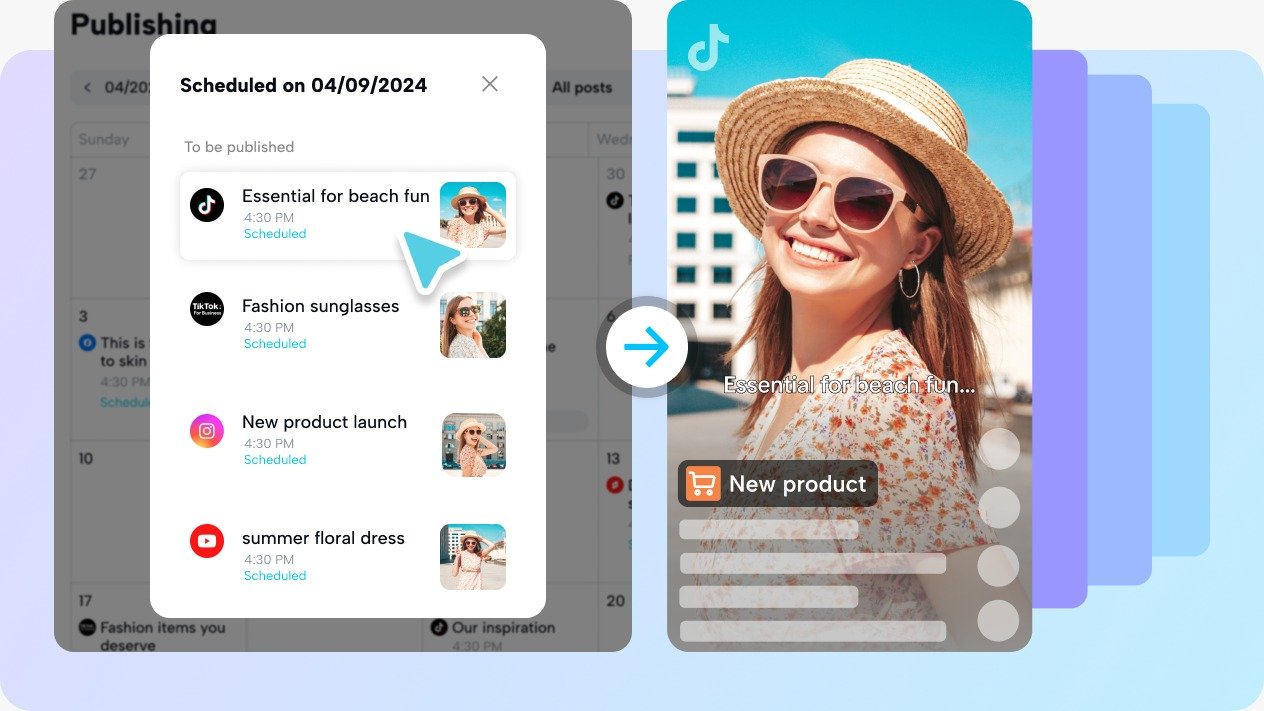
Step-by-step: swapping a photo background in Pippit
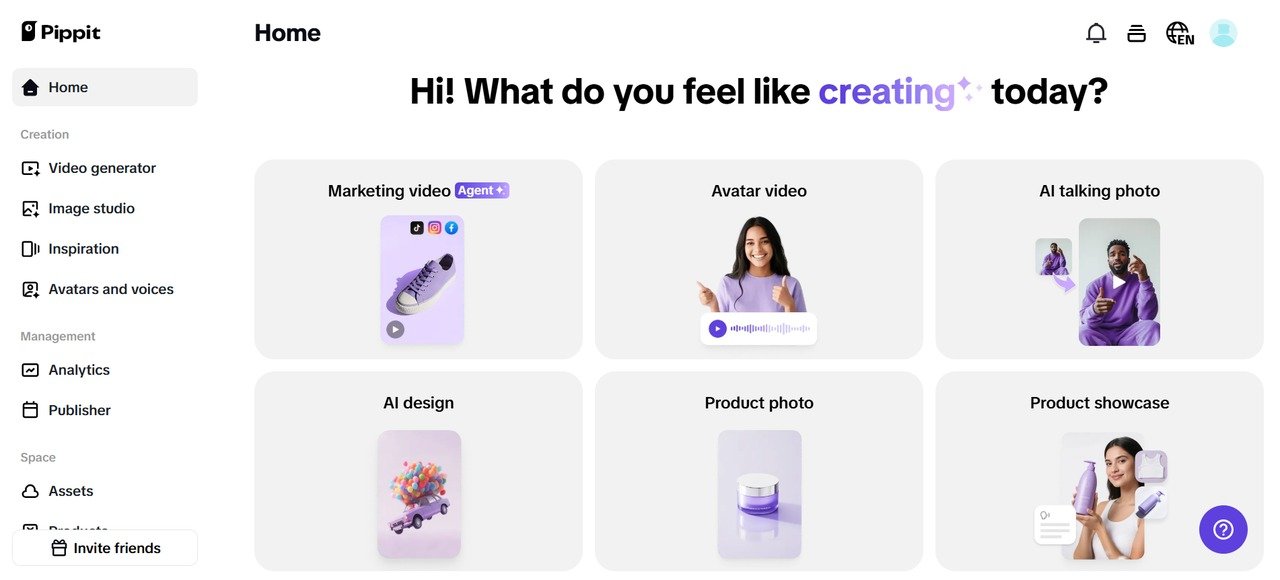
Step 1: Access the background change tool
Log in to Pippit using your login name and password. You will be in the Image Studio. You will select the AI Background tool as a part of the menu options to begin your image editing process. This is a powerful tool to replace backgrounds, for your professional image creations or artistic decision making. Once you are inside the feature, you can begin your image transformation easily.
Step 2: Upload image and select background
Click the Upload to bring in your image from your device, product assets, or current media library. The AI Background tool will delete the current background automatically for a fresh start. Select a new background from available presets or type out a prompt and have AI create it for you. This guarantees your new background is custom-made to suit your creative purposes
Step 3: Customize and download
Refine your design with the customization features to change background colors, insert objects, or enhance the substituted background for a perfect finish. Recheck your final design to confirm that it meets your expectations. After ensuring satisfaction, click the Download button to export your image to high resolution, choosing your desired format and resolution settings for maximum results.
Framing, crop, and the illusion of quality
Crop in tightly for detail shots and broad for lifestyle compositing. Square crops work well on society, whereas long banners fit hero shots. When setting text overlays, utilize negative space smartly so headlines can breathe. A soft crop can transform a relaxed tabletop shot into a framed studio look.
Fun H2: three fun steps to alter audio speed in Pippit
Open your project and select the audio clip you wish to adjust. Use the audio speed changer and drag to speed up or slow down until it fits the mood you desire, subtle changes make voices sound cinematic, large changes create quirky effects. This is where Pippit’s timeline and preview tools assist you in listening while you fine-tune. Export the track and sync it back to your image or video sequence for a completed piece that is alive with pace and rhythm.
Batch workflows that save time
Shoot multiple colorways or angles in one session, then use a template in Pippit to apply the same background, grade, and shadow anchors. Export hero images in multiple aspect ratios at once so you can post variations without re-editing. Templates save decision fatigue and make your feed look cohesive.
Testing and measuring what works
Perform basic A/B testing to contrast backgrounds. Post two versions with the same caption and observe engagement for a few days. Record wins and cycle successful backdrops into forthcoming campaigns to amplify results. Don’t employ background swaps to suggest materials, origin, or dimensions your product lacks. Utilize edits to define context instead of deceiving. Honesty safeguards reputation and establishes enduring trust.
Final push: test your own tabletop studio with Pippit
With minimal props, controlled lighting, and Pippit’s Image Studio, any creator can create images that have the feel of a studio production. Replace environments that resonate with your brand, be honest with edits, and reframe assets into short videos for social. Begin a Pippit session and test product today and see how much added perceived value a background replacement brings.


