
Beginning with photo editing is difficult. Most of the tools appear complex, menus are jammed, and initial results are always flat. Newbies encounter the same problems repeatedly: unusual colors, smudgy details, or images that don’t look good when shared. This is where CapCut Desktop Video Editor comes in.
Its transparent layout and intuitive tools make modifications straightforward for everyone. With just a few clicks, you can tidy up a photo, adjust the light, and determine the perfect size for sharing.
You don’t need countless hours of practice to see the difference. This guide will reveal to you the key advantages, the step-by-step process for initial edits, and how to export clean images confidently.
CapCut PC Photo Editor for First-Time Edits — Why it Helps
For new users, the most difficult aspect of editing is discovering a program that does not weigh them down or confuse them. CapCut Desktop Video Editor fixes this with an uncluttered dashboard and straightforward menus. The program is made to walk new users step by step, with easy layouts and pre-made features that get results in a hurry.
Ease of use and quick result templates
CapCut PC works as a simple photo editor with drag-and-drop functionality. You may begin a new project, select a template, and drop the photo in place. The ready-made layouts assist you in designing in a matter of minutes, even though you have never edited before.
One-click auto-adjust and smart suggestions
The auto-adjust tools correct light, color, and sharpness in a single click. This reduces trial and error and provides you with a good starting point to edit immediately. Such intelligent tools also assist you by letting you know what changes enhance the photo the most.
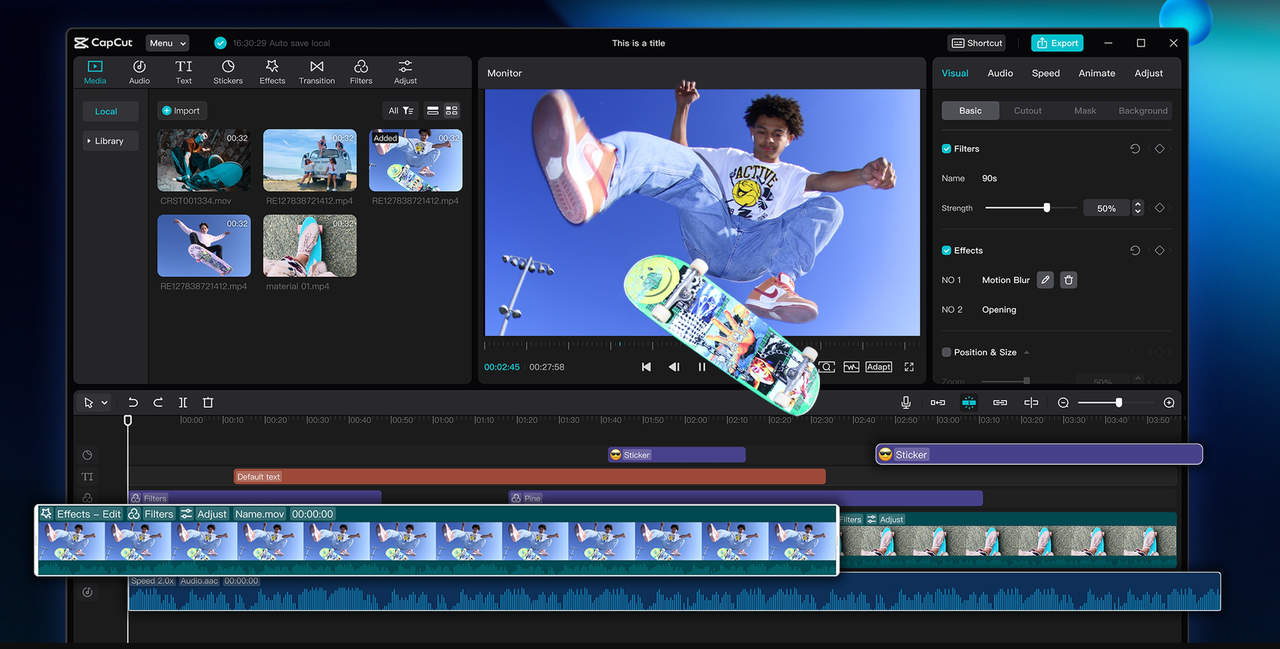
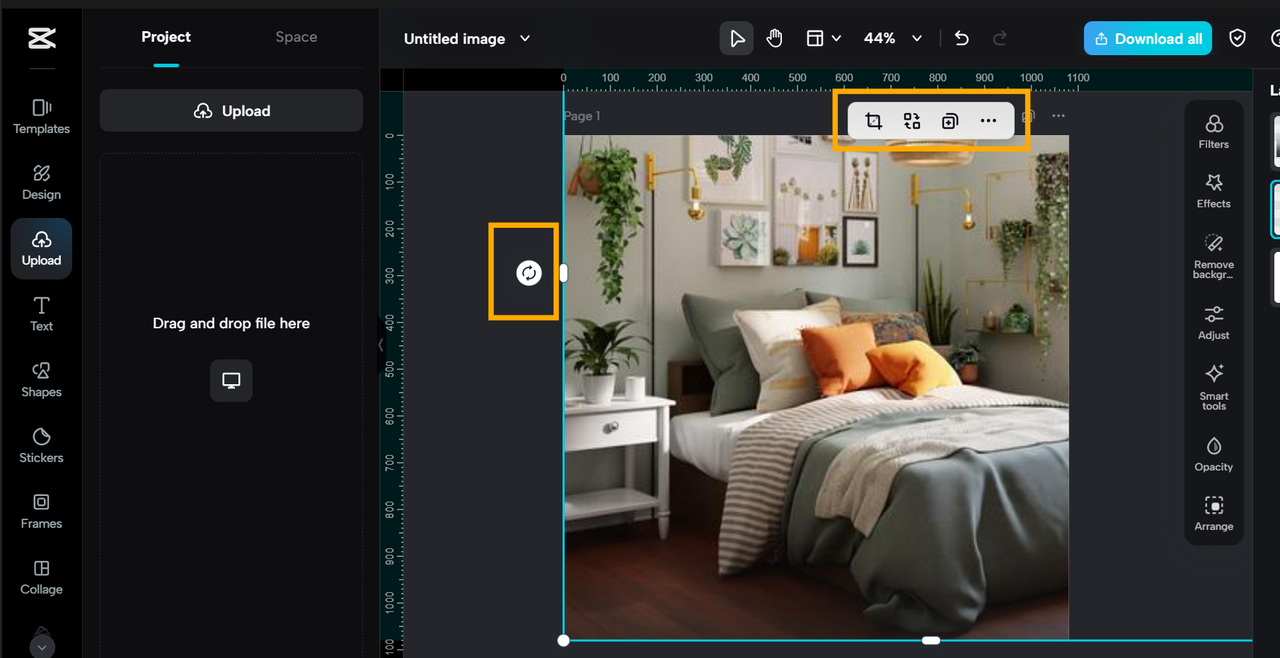
Integrated background remover/auto cutout
You can erase a cluttered background in seconds with CapCut PC. The auto cutout feature crops out the background and allows you to cover it with a solid color or your own photo. Portrait shots become tidy without lengthy manual efforts.
Overlays, stickers, and text boxes
Newbies can layer on excitement by adding stickers, frames, or text. These easy tools allow for telling a story or bringing attention to detail. Some also combine CapCut edits with an AI video generator to produce content that combines photos with short videos for social media posts.
Export presets
CapCut PC prevents size errors by having export presets. You can use one selection to determine the correct format for Instagram, YouTube, or another site, and share without additional resizing.
Clear callout
Remember, CapCut Desktop Video Editor is not completely free. Premium filters, AI features, and asset packs might cost money.
Steps to Use CapCut Desktop Video Editor for First-Time Photo Edits
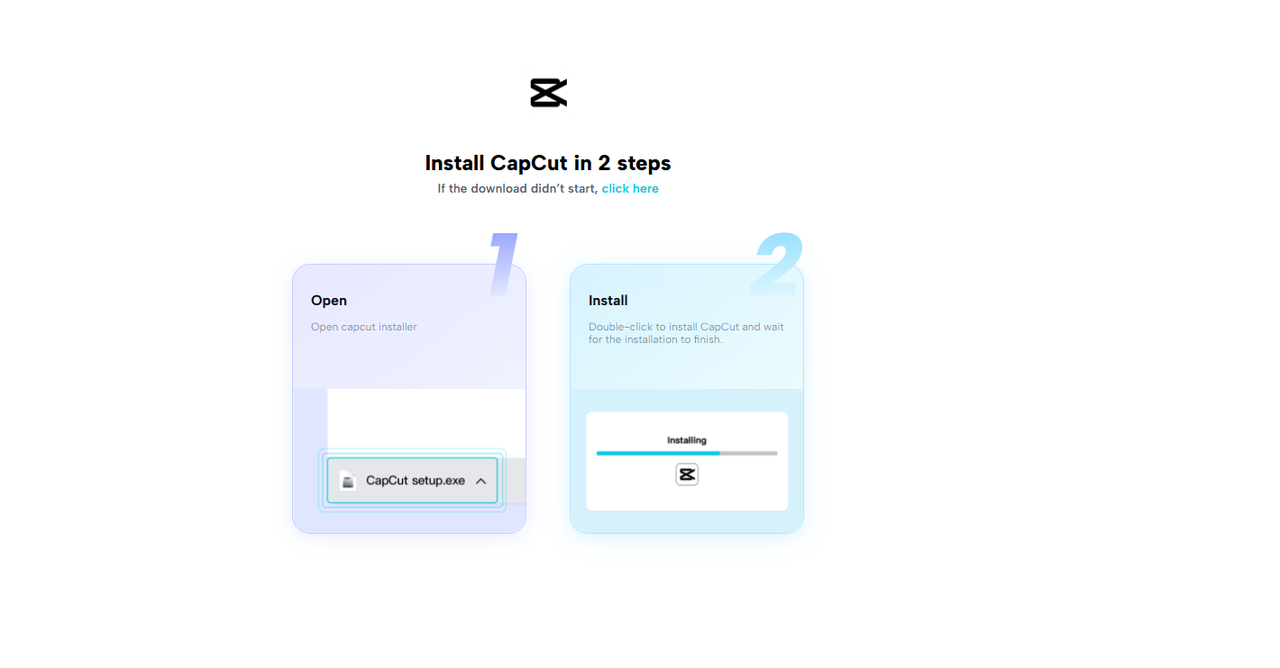
Step 1: Install CapCut PC
Download CapCut Desktop Video Editor solely from the official website for Windows or Mac. Install the setup and complete the on-screen instructions. Log in using your email or social account to store projects.
Some are free to use, but higher AI features might require payment. Steer clear of third-party sites for security reasons.
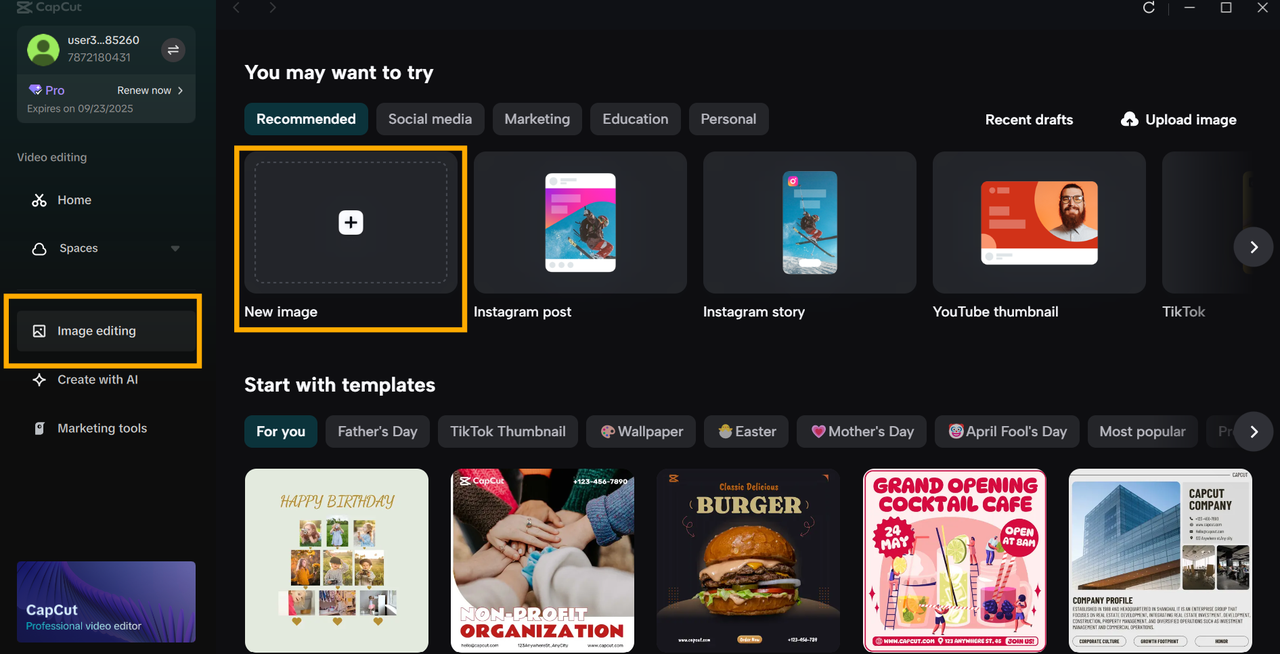
Step 2: Start Image Editing
On the home page, click Image Editing, then select Create New Image. Choose a canvas size such as an Instagram post, story, or YouTube thumbnail to begin designing.
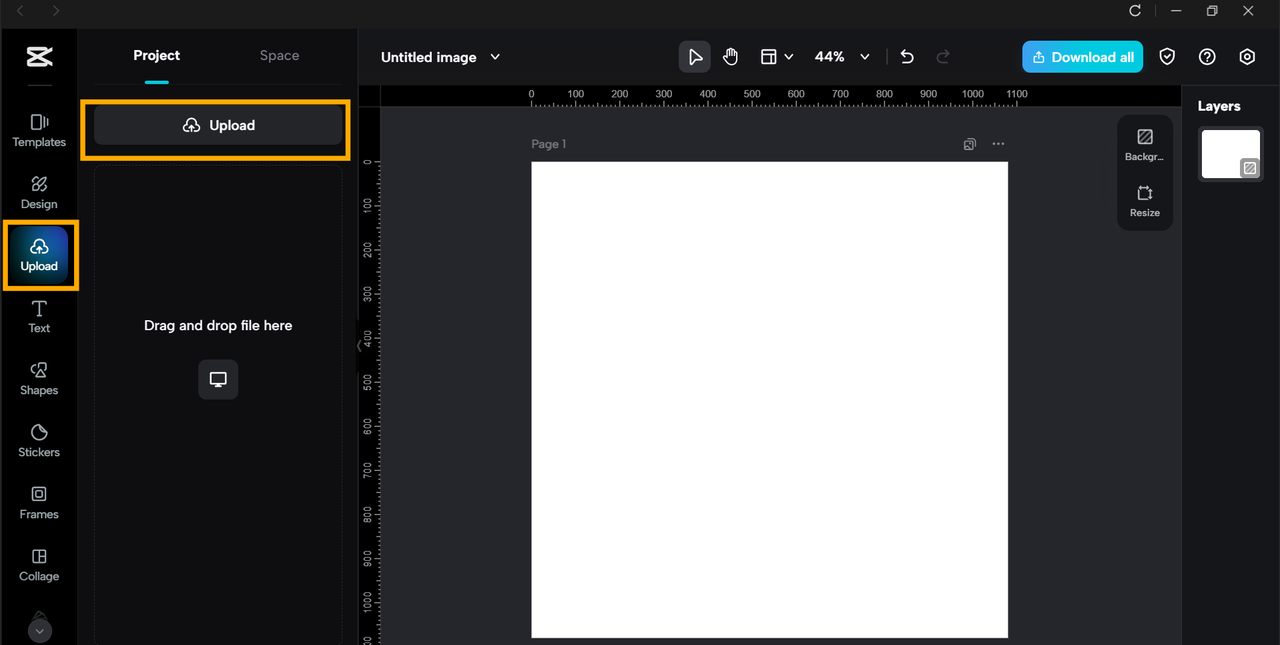
Step 3: Upload Your Photos
Open the editor and click Upload to add your image, or simply drag it onto the canvas. Keep your original files stored separately to avoid overwriting them.
Step 4: Basic Edits
Start by cropping and rotating to set up the frame. Then, control exposure to open up dark shadows. Employ contrast to create depth, saturation for color intensity, and white balance to correct color hues.
Follow this simple order: crop → brightness → contrast → saturation → white balance. This checklist keeps edits clean and easy for newcomers.
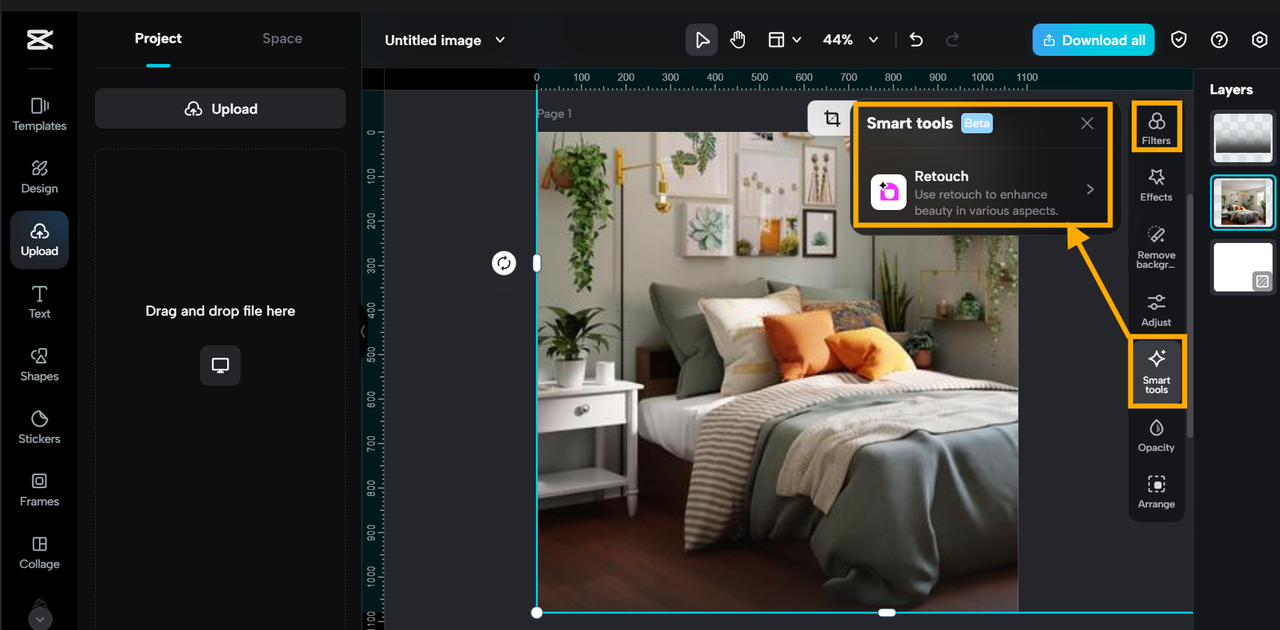
Step 5: Add Filters and Retouch
Click on “Filters” in the left panel to apply a pre-defined style. Make minimal adjustments so the picture still appears natural. For photos of people, use “Retouch” to iron out skin or remove blemishes. Always save a copy of the original image so you can revert if you need to.
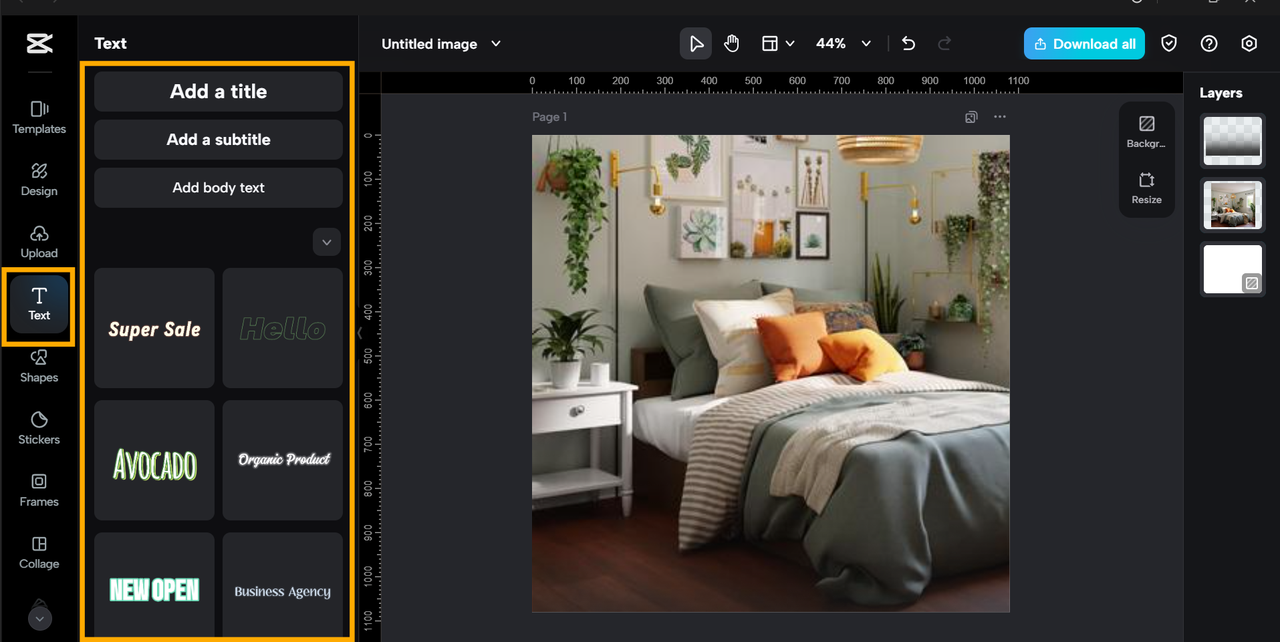
Step 6: Insert Text, Stickers, Frames, and Overlays
Choose “Text” from the menu to add captions or labels. Use stickers and frames sparingly. With short clips, CapCut PC is also an online video editor.
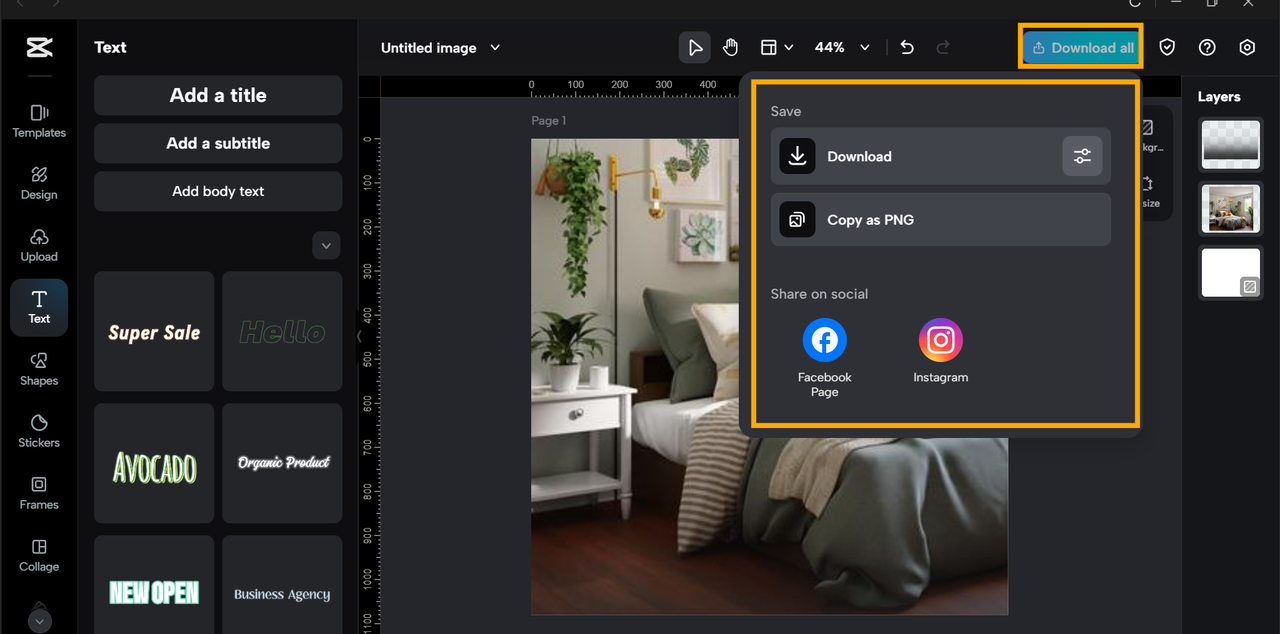
Step 7: Export and Share
Click the “Download” at the top right. Set resolution, format, and size. Use a preset for social media to export photos directly without further resizing.
Conclusion
CapCut Desktop Video Editor simplifies photo editing for new users. Its neat tools, available templates, and fast export settings ease new users into editing stress-free. With auto-fix, filters, and presets, you can enhance photos within a few clicks.
Although most of the features are free of charge, premium options such as AI tools and premium filters might be paid for. To begin with, attempt a one-shot edit: import the image, apply auto-fix, and export the outcome.
You will notice a distinct before-and-after change. Once you are confident enough, follow the guide step by step to learn more tools and achieve professional-looking edits with CapCut PC.


